Tag Archives: Recipe

Dijon Mustard Pork Chops

12 Mar

Yes, I’ve been missing in action. And, I was terribly depressed this evening when I logged onto my blog stats and saw how low my numbers had fallen. Don’t run away yet … I’m just adjusting to a new blogging schedule where I have to find time for my personal blog and the blog I’m writing for my new job which hopefully will translate into $$!

Needless to say, I thought of you all when I cooked tonight. {Yes, I actually cooked!} Pork Chops were on sale at the grocery store … and being the thrifty person I am {ha} I decided tonight would be a great night for Dijon Mustard Chops! They are so simple, that you just may laugh at me!

You will need: Boneless Pork Chops {I prefer thick cut}, a jar of Dijon Mustard, and a package of plain Shake-n-Bake or something similar. All you are going to do is coat the pork chops in the mustard, roll them around in the crumbs, and bake at 450 for approx 20-25 minutes depending on thickness. Piece of Cake. May I repeat: Piece.of.Cake! I served mine with steamed asparagus and some mashed potatoes. And, it all worked out nicely. No, I didn’t take a picture .. because I just plain forgot… But, I’m sure you will forgive me. Not much to see .. just a tasty pork chop!

Hope you all are doing well. Spring is in the air. I can not wait for some warmer weather. I took a little walk on the beach the other day with the dog and let him run around and play in the water. It was so nice to be outside enjoying the afternoon without freezing my toosh off! …. I have a recipe for Seafood Gumbo that I really want to try this weekend. There are some ingredients that I’m not too sure of, and some that I haven’t cooked with before… so it should prove to be very interesting. I WILL take picture! Until then… Night, Ya’ll!

Carne Asada {Picture Tutorial}

21 Feb


It was almost warm today! And, nothing makes me happier than a sunny day! Last year, I really got into a Carne Asada kick… we were living near the beach, and almost every weekend during the summer we would marinade some beautiful meat, head to the beach for a few hours, and come home and cook some delicious Carne Asada & Cheese Dip, and drink a few Coronas! It really was the perfect plan for a summer weekend! We hadn’t cooked this meal in what seems like forever so, when I saw the sun out this morning … I knew it was the perfect time! {And, I hadn’t blogged about it yet… oh, ya the pictures!}


According to Wikipedia, Carne Asada literally means “roasted meat” … My definition? … Heaven! Let me show you why…


You will need:

{Recipe adapted from Simply Recipes.com}

  • 2 pounds of Skirt Steak
  • 4 garlic cloves, minced (I’m a garlic lover, I used approx 7-8 cloves)
  • 1 jalapeno pepper, minced
  • 1 teaspoon ground cumin
  • 1 large handful of cilantro, finely chopped {There is great flavor in the stems – don’t be afraid to chop them too}
  • Sea salt and pepper, to taste
  • 2 limes, juiced
  • 2 tablespoons white vinegar
  • 1/2 teaspoon sugar
  • 1/2 cup olive oil

And, here’s what you do!

Lay the skirt steak out on a flat surface and season generously with salt and pepper. Rub it in with your hands. Let the meat sit while you make the marinade. To make the marinade, combine all the above ingredients in a medium mixing bowl.

{are the striations on this skirt steak not the most beautiful things you have ever seen?}


Once you have completed the marinade, pour over the meat in a bowl or dish which you can cover.


Cover and refrigerate for 3-4 hours. {Trust me, it’s worth it!} Meanwhile…. let’s talk about Cheese Dip {yes, please}


If I had known how easy cheese dip was to make, I would have made it years ago … {and, I’d be a heck of a lot larger than I am now!} This dip an amazing appetizer to this Carne Asada … and will hold you down until the meat is ready. Just grab a few Coronas and you’ll be alright! To make the cheese dip you will need:


  • Cajun Chef – Nacho Slices Jalapenos, minced {2-3 large spoonfuls}
  • 1/2 pound Ground Beef
  • Approx 1/2 pound of White American Cheese
  • Milk

The process is crazy simple – Set yourself up with a double boiler. If you don’t have one, get two pots {one smaller than the other} fill the bigger one half full with water, and float the other one inside it. You just don’t want to burn the cheese – and puting it directly on the burner will do that! … Cube the cheese, mince the jalapenos, and brown the ground beef.

Add the cheese and jalapenos. Add milk until the cheese cubes are about halfway covered.

Let cheese cook slowly until fully melted – then add meat. Cook a little bit longer on low, string occasionally. Serve with corn chips.


Now, back to the meat!!! After you let the meat marinade for 3-4 hours, prepare your grill {or if cooking inside, a large fry pan}. Remove the meat from the marinade and try to get excess off so it  does not burn. Grill meat for a few minutes on each side. Depending on thickness. This should only take a few minutes total. When done, remove from heat and let sit for approx 5 minutes.


To Serve: Warm some corn tortillas in a fry pan over medium/high heat for approx 20-30 seconds each side. Serve with chopped cilantro and onion. {Yes, in America you’d be piling on the sour cream and cheese, but think outside the box. This is how it is served at roadside stands, and it’s good – I promise}


I hope you enjoy this meal as much as we do! There is something about this meat that is so delicious. And, combined with the cheese dip and some good ‘ol Corona .. it is the perfect meal for a sunny day or summer afternoon! Keep your fingers crossed – warmer weather coming our way! Night ya’ll!

Monday Night Musings

15 Feb


Have you officially hit rock bottom when you eat a microwave-able miniature sausage biscuit for breakfast and a bologna sandwich for lunch? {By the way, I only know how to spell bologna because of the Oscar Mayer song we used to sing as kids!}


It seems the theme of my blog the last few weeks has been how to incorporate being busy and working full time with being a domestic goddess. Perhaps my definition of “domestic goddess” will change over time. I have so much going on right now that food and eating in general are just after thoughts to my day. Once I get home from work, change into sweats and finally sit down … all of a sudden my brain say “food!” and I grump’ily roll along.


I did eat a piece of the most amazing Carmel Cake the other day. I’d love to learn how to make it. The whole cake seemed to be dipped in a Carmel “frosting” that had a texture almost like a chocolate shell on an ice cream …{mmm, I need to roll of this couch to Dairy Queen!}  If anyone reading has a recipe or knows where I could find a great one, please let me know!


Lastly, I’m really excited because my mom found a cookbook from one of my favorite restaurants in our hometown. She’s mailing it to me because it has a recipe for Gumbo in it that I can not wait to make. I’ve been craving this gumbo so much that I seriously contemplated calling the restaurant to see if I could get them to ship me some. One time I even packed a whole cooler of it and drove it 4 1/2 hours home on ice! Now – that is LOVE!


Oh, and as a final thought – I had full intentions of baking cookies for Valentines Day that I was then going to ice to look like those little conversation hearts you get when you are in elementary school – yeah, didn’t get around to that either! ha ha {Story of my Life}


Night Ya’ll

Beef Stew A-La-Package {Picture Tutorial}

2 Feb


Ok, foodie friends… I have a question: Would you consider it cheating to use a pre-packaged seasoning packet? {for say, chili or stew} I’ve always thought of those packages as all your spices rolled up into one so you don’t have to spend $30 buying all the full size spice bottles that you may only use once in a blue moon. {mmm, blue moon. I need a beer. It’s been a long day} Anyhow… if you consider it cheating, I cheated. I however, think I’m a smart domestic maven who just saved herself a boat-load of money! {although the spice cabinet will continue to lack at this rate}


First of all, I don’t have a slow cooker or crock pot, so this whole “bag” idea is perfect for me! {just perfect} Wait until you see how this whole meal comes together in a bag!! It’s pretty impressive for whomever invented it!


Beef Stew a-la-package. Your cast of characters …


{Not pictured is the second package of meat I used & the flour which the package calls for}


My Irish ancestors are rolling in the graves … stew, from a package?!


This whole meal is pretty straight forward. Cut up some potatoes, celery, onion, and baby carrots. {I’m in a house with carrot-haters, so I added some peas for their liking} Season meat with salt/pepper. Mix the seasoning package with some flour and water. Throw all the ingredients in the really cool plastic bag. Pour the seasoning mix over the ingredients. Tie the bag, cut some slits, and bake for an hour and a half.


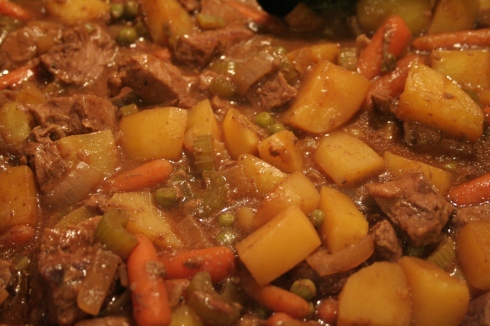
Are you not just utterly amazed at the coolness of this plastic bag… and the fact that it isn’t going to melt away into my potatoes? Love it. Without further delay .. I give you my From a Plastic Bag, Make your Ancestors Roll in their Grave, Save you $30 in spices, Beef Stew a-la-package!  Enjoy!!!


Chicken Broccoli & Rice Casserole {Picture Tutorial}

1 Feb


Ever wander around the grocery store just praying that dinner will jump in the cart on its own? I swear I walked up and down the aisles pushing my cart for a good thirty minutes before I came up with a dinner idea. Most people probably have an idea before they go to the store …. but I’m not most people. Clearly. So, tonight we are having Chicken and Broccoli Casserole. {the chicken just begged me to jump in the cart} I blogged about it once before: here, but never posted any pictures. Tonight, you get pictures.


Here’s what you need:

4 TBSPs of Butter

1/3 Cup of Flour

1 TSP of Salt

1/8 TSP of Pepper

1/8 TSP of Garlic Powder

1 Cup of Chicken Broth

1 1/2 Cup of Milk

1 Bag of Instant Rice (you know, ‘Boil a Bag’)

2 Cups of Chicken (Tonight I used fresh chicken, but you can use the frozen Tyson kind that comes in cubes too!)

1/4 Cup of Shredded Cheddar Cheese (I usually use much more cheese than is called for!)

3/4 Cup of Frozen Broccoli (I use the small florets, and also use more than is called for!)

Bread Crumbs for Topping


And, here’s what you do:


Preheat oven to 350 degrees and start the rice. I’m using fresh chicken tonight, so I’m starting by cutting up the chicken and cooking it with a little butter and salt/pepper.


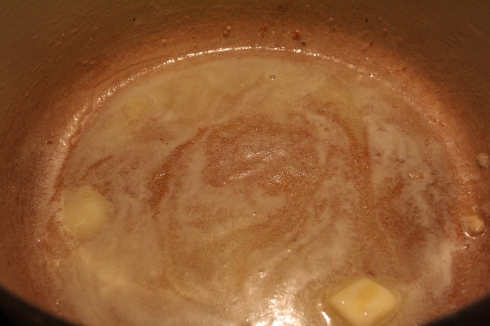
Remove the chicken from pan. Melt butter over low heat. Combine flour, salt, pepper, and garlic powder. Slowly add to the butter until paste starts to form and gets bubbly.


Once paste is smooth and bubbly, add chicken broth and milk. Whisk constantly, over medium heat, until mixture becomes creamy and smooth. Let boil for about one minute {continue to whisk}.


Mix in remaining ingredients: chicken, cheese, rice, and broccoli.


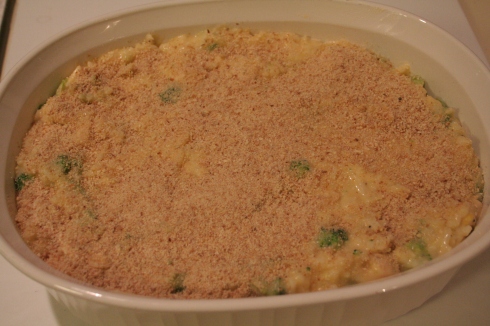
Pour into casserole dish, and cover with thin layer of bread crumbs. Put in oven for approx 40-45 minutes, or until bread crumbs start to brown around edges. Let stand for 5-10 minutes to thicken before serving.


This dinner turned out great, and was exactly what my tummy wanted tonight! Perfect comfort food for a chilly night {and easy too!} I love making this too, because it makes great leftovers. A lot of times leftovers don’t get used in my house … but this one never fails! I hope you have time to make it and enjoy it when you do! And, as always – I’d love to hear all about it! Night Ya’ll!


Quick & Easy Chili Recipe {Picture Tutorial}

25 Jan


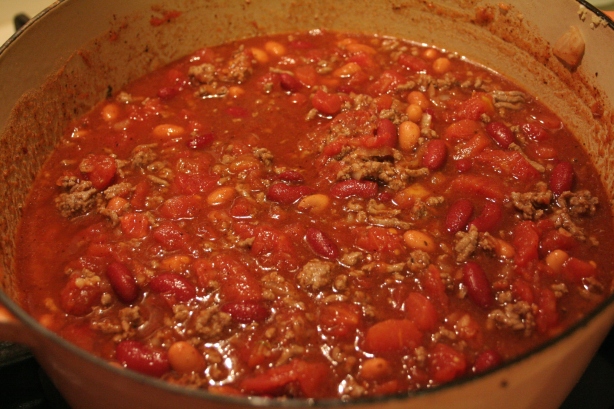
**Update: This blog is getting a ton of visitors from Pinterest {Thanks y’all!} … Yes, I forgot to mention that you need to throw a can of dark red kidney beans a pinto beans into the mix. They’re in the picture, but I must have been too busy eating chili to realize I left it out of the instructions. Just make sure you drain them and you’ll be good! Enjoy and thanks for all the nice comments! – Amy **

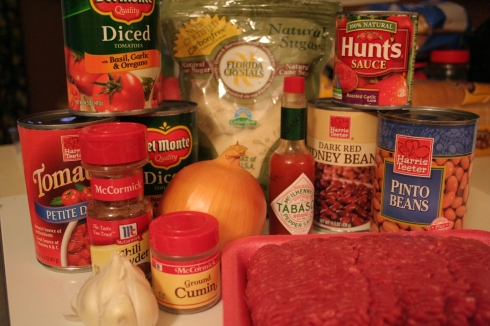
I was really craving some seafood tonight – scallops to be exact – but somehow I managed to end up with a big bowl of chili. Let me tell you though, I cook some mean chili! And, don’t forget, it’s ridiculously easy and makes your kitchen smell like you are a seasoned domestic goddess {just what I’m going for – score!} Really, all you need for this recipe is two photos: the ingredients and the finished product… it’s that easy… dump the stuff in the pot and let it cook! Now, those are my kinda recipes!!! {but, just to be nice… I’ll include the measurements}

You will need:

{Serves approx 6-8}

1 Medium Onion {minced}

3-5 Garlic Cloves {minced}

1 – 1 1/2 pound of lean ground beef

2 cans of diced tomatoes {Onion, Garlic, & Oregano flavor)

1 can of petite diced tomatoes

1 can tomato sauce

2 TBSP Chili Powder

1 TBSP Ground Cumin

2 TBSP White Sugar

1 TBSP Salt

1 TBSP Tabasco Sauce

1 TSP Pepper

And, here’s what you do:

1. Brown the beef with onion and garlic. {Drain fat when finished and return meat to pot.}

2. Add cans of tomatoes, sauce, chili powder, cumin, sugar, salt, Tabasco, and pepper.

3. Simmer for at least 30-45 minutes …  but it tastes better the longer you let it simmer.

Ta’da:

Beautiful isn’t she? I like to serve mine with cornbread muffins {the kind in the Jiffy box}, a bit of shredded cheddar cheese, and a dollop of sour cream. Some people balk at the sour cream, but I think it tastes good.

{Did anyone happen to notice the amount of chili I cooked? I told you I have a problem with portion control.}

Rave reviews around this house for the chili … why don’t you try it at your house and let me know how it goes! I’d love to hear, as always! …. On a side note, I’m discovering my passion for Marketing all over again. With this new career, almost every day brings a new opportunity to use my marketing degree and marketing knowledge … and so far, I really love it. I hope that it stays this positive for a while to come!!!

Hope you all had a great day. And, I hope you enjoy the chili recipe. {Time to go watch the Bachelor – I should be ashamed for watching such nonsense … but I’m not!!! ha} Night ya’ll!

Perfect Pound Cake w/ Blueberry Syrup {Picture Tutorial}

17 Jan


I was so full and happy from my dinner last night, that I left out a few details that you might find amusing:

  • I burnt my thumb by grabbing the lid of the dutch oven out of pure excitement to see what my efforts {and dutch oven} had created. It’s fine now – but still a little tender. Thanks for asking.
  • I made garlic whipped potatoes in my new mixer. I love boiling them {Yukon gold} until almost all the water is out of the pot, and they fall to mush as soon as they land in the strainer. The mixer gives them such a good consistency, and the foodie bf was very excited about them.
  • I should have taken a picture of our plates after dinner. If I wouldn’t be so completely mortified, I’d tell you we licked them clean … {did I just say that out loud?}
  • I’m craving some leftovers and will probably want to cook this once a week for at least the next three months! Anyone wanna come over for dinner?!


Now, moving on to a more serious topic: Dessert. You probably know from my blogroll, that I follow the Pioneer Woman. {and want to get her cookbook} She posted yesterday about “The Perfect Pound Cake,” and let me tell you it is perfect! You can count this as my second “from scratch” cake … made with my new mixer of course. And, me being the domestic goddess in training that I am, I decided that the recipe needed a little addition: fresh blueberry syrup. Little did I know that pound cake and blueberry syrup is an “Alaskan thing” according to the Alaskan Foodie BF. So, not only was it utterly delicious, but brought the bf a bit of ‘home’…. go me! Success.


You need, need, need to make this cake! Trust me. And, since I know you are going to listen to me, here’s what you’ll do:


You will need:

3 Sticks of Butter {Room temperature/Softened} Hello Hips!

3 Cups of Sugar

5 Whole Eggs

1 TSP Butter Flavoring

2 TSP Lemon Flavoring

3 Cups All-Purpose Flour

1 Cup of Sprite or 7-up {I used Sprite}


And, here’s what you do:

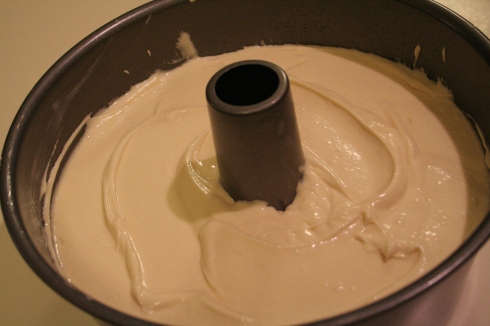
Preheat oven to 325 degrees. Cream the butter in your mixer until fluffy. Add sugar {one cup at a time} mixing after each addition. Add eggs {one at a time} mixing after each addition. Add butter and lemon extracts, and mix well. Add flour {one cup at a time} mixing well after each addition. Add Sprite, then mix together until combined. Scrape sides of bowl and mix again. Pour into well greased Bundt pan {this is the only one I had} and bake for 1 hour – 1 hour and 10 minutes. Until the cake is no longer “jiggly.”


To make Blueberry Syrup

{Emeril recipe found online}

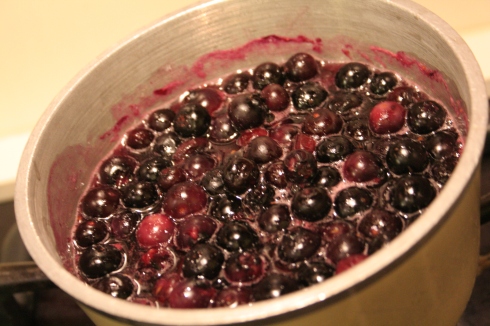
I combined 1 cup of fresh berries with 3/4 cup of sugar, 3/4 cup water, and 2 teaspoons of lemon juice. I brought the mixture to a boil and then simmered until it was the consistency I wanted. Probably about 15 minutes.


Prepare yourself now … this is going to make you hungry! … If you dont’ have the ingredients to make this cake right away, you may want to stop reading RIGHT NOW! … Be warned!


Ah’mazing. De’lish. I give you the Perfect Piece of Pound Cake


Its ok, you can exhale now. And, on that note… I think I’m going to go get a piece of cake! Hope you all run out and make this little baby. And, if you do – I’d love to hear how it goes! Enjoy!

Braised Short Ribs {Picture Tutorial}

16 Jan


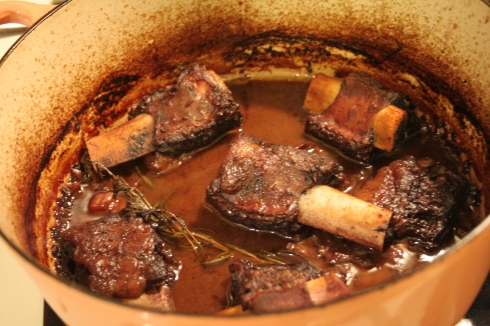
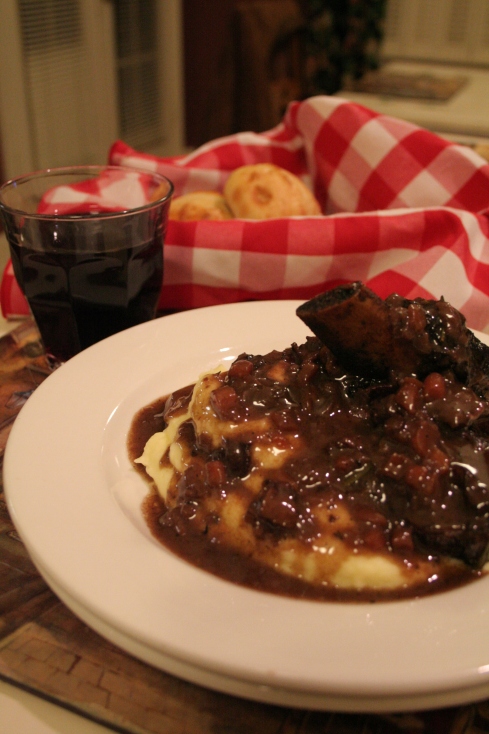
After a dinner at McDonald’s on Thursday, and a rotisserie chicken from the grocery store on Friday… I was beginning to think my domestic side had flown the coop. Thankfully, I’m baaaaaack! I drew inspiration from my new Le Creuset dutch oven {which I’ve found out are considered ‘vintage’} and a blog post from the Pioneer Woman. The result: Braised Short Ribs and Garlic Whipped Potaotes! {dessert will follow in the next post, and was also amazing!}


Thanks to the Pioneer Woman for this recipe idea. I fully intended on following the recipe exactly as it was written, but the grocery store didn’t have Pancetta {I used regular, thick cut bacon} … and although I took a picture of flour as one of my ingredients, I must have been spacing out at the time and didn’t even use it. Everything turned out wonderful though and there were lots of fully and happy tummies in my house tonight! So, here ya go!


You will need:

6-8 Whole Beef Short Ribs

Salt and Pepper to taste

1/4 cup of All-Purpose Flour (I did not use this, and will explain later)

6 pieces of Pancetta (I used regular, thick-cut bacon – diced)

2 TBSP Olive Oil

1 Medium Onion – Diced

3-4 Whole Carrots – Diced

2 Whole Shallots – Minced

2 Cups Red Wine

2 Cups Beef Broth

2 Sprigs of Thyme

2 Sprigs of Rosemary


And, here’s what you do:

1. Salt and Pepper generously (This is where it is recommended that you roll the ribs around in flour – I forgot, and it worked out just fine.)

2. In a large dutch oven {Hooray}, cook the Pancetta (our in our case, bacon) over medium heat until completely crispy and all the fat is rendered. Remove bacon and set aside. Don’t discard grease.

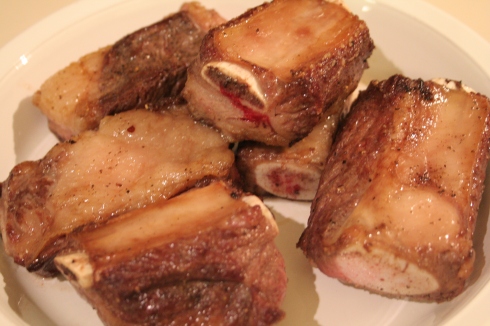
3. Add olive oil to pan with grease, and raise temperature to high heat. Brown ribs on all sides {no more than 45 seconds on each side} Remove and set aside.

{Note: I thought I was going to burn down the house. The pan really needs to be HOT in order to braise the edges … and it smokes and pops, etc. But it does the trick!} This is also where I started to run around the house screaming “Come see, Come see! Look! Look what I’m cooking! ….

4. Next, turn temperature back to medium. Add onions, carrots, and shallots to pan for 2 minutes. Then, pour in wine and scrape the bottom of the pan to get all the good stuff off the bottom. Bring to a boil for approx 2 minutes.

5. Add broth, 1 teaspoon of salt, and plenty of pepper. Taste and add more if needed. Add ribs {they should be almost completely covered} and the full sprigs of Thyme and Rosemary

6. Put lid on and cook for 2 hours at 350 degrees. Reduce heat to 325 and cook for an additional 30-40 minutes. When done, remove pot from oven and let sit for 20 minutes. Fat will rise to the top – skim it off before serving. Serve 2 ribs on a bed of garlic mashed potatoes (see previous blog for Julia Child recipe – de’lish) … spoon gravy/juice over ribs and potatoes!


Full tummies all around. This dish was ah’mazing and was actually pretty easy to make. Once the prep work is done… it does its magic all alone in the pot! Just make sure you have enough self control to wait nearly 3 hours to open the present! Hope you enjoy & as always, if you make it – I’d love to hear how it goes! Enjoy!

Sweet Potato Souffle {Picture Tutorial}

11 Jan


I remember when I was a child, my aunt would bring sweet potato souffle to Thanksgiving dinner each year. It scared me. It was orange. And, a sweet potato. Who eats sweet potatoes? So, it never went near my plate. It wasn’t until last year at Thanksgiving {after what 20 years?} that I actually tasted the sweet potato dish. Holy dessert! I had no idea it was sweet and tasty … like cheating and eating dessert while eating dinner! Ever since, it has been a staple on my holiday menu {ok. one Thanksgiving and one Christmas} but it will be a staple from now on! I made it for my family on Sunday for our “Second Christmas Dinner” and, in the mad dash to wrap up the meal, only got a few pictures … but I think you will get the idea! So, here we go:


Sweet Potato Souffle {Simple, Easy, Delicious}

{Serves Approx 6}

{Adapted from: Cooks.com}


You will need:

Two 16 oz cans of Sweet Potatoes (I only had one large can, and it worked just fine)

1 cup brown sugar

Approx 2/3 TBSP salt

1 tsp cinnamon

2 eggs beaten

1/2 cup butter

1 pkg of small marshmallows


And, here’s what you do:

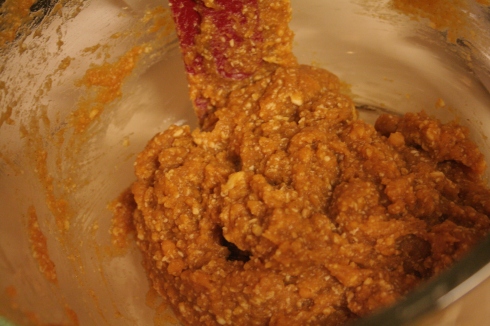
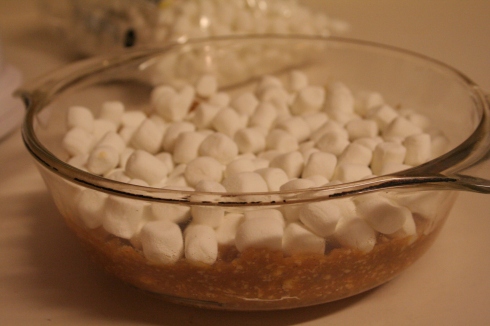
Preheat oven to 350 degrees. Grease casserole dish with butter. Mix all ingredients until thoroughly mixed. Place half of mixture in dish. Place a layer of marshmallows on top. Top with the other half of the mixture. Bake for 30 minutes. Top with layer of marshmallows. Cook for an additional 10 minutes, or until marshmallow topping is lightly browned. Serve.

{Top of plate} Of course, I didn’t get a picture before it left the dish.


This truly is an easy, delicious, classic dish. I hope you enjoy & as always, if you make it – I’d love to hear all about it! Night Ya’ll. {for real this time}

Chocolate Chip Cheese Ball {Picture Tutorial}

11 Jan


Sweet. Chocolate. Cheesy. Goodness.


I had been waiting for an opportunity to make a Chocolate Chip Cheese Ball, and visiting my family and cooking them a ‘Second Christmas Dinner’ was just the opportunity! I made it early in the afternoon, chilled it, and served it while everyone was chatting and waiting around for me to emerge from the kitchen. And, it was perfect for me to make with my new mixer! Of course, I brought my camera with me … and had it in hand for a picture tutorial. So, here we go:


Chocolate Chip Cheese Ball

{Help yourself appetizer type dish. Serves plenty}


You will need:

One 8 oz package of cream cheese

1/2 cup butter softened

1/4 tsp vanilla

2 TBSP brown sugar

3/4 cup confectioners sugar

3/4 cup {or a bit more} mini chocolate chips

Graham Cracker sticks or pieces


And, here’s what you do:

1. With your wonderful mixer that Santa just brought you for Christmas, mix the softened {room temperature} cream cheese with the butter and vanilla.

2. Slowly add in the brown sugar and confectioners sugar.

3. Fold in the chocolate chips.

4. Mold into a ball by rolling mixture in saran wrap … or line a bowl with saran and smush the mixture in to take form of the bowl.

5. Chill for at least an hour before serving with Graham Cracker sticks or pieces.


Simple. Easy. Delicious. I could easily sit down and eat this whole thing by myself. You know the food is good when you serve something to a ‘chatty’ room and you hear the hush come across the house. The sound of satisfied, full mouths! As always, I’d love to hear all about it if you make it! Enjoy!